ECU programming guide
The following information is an overview of what's typically involved in reprogramming a car. Before you attempt it for real, please make a point of reading our the Knowledge Base article Before Programming an ECU in this section.
Programming overview
Reprogramming involves taking the following steps, but there may be car-model-related variations so only do the job for real with the specific EcuTek instruction manual alongside you.- Connect the vehicle interface cable to the OBD-II connector and turn the ignition switch to ON
- Open the ProECU software and choose Tools then Detect Vehicle
- Select Program Engine ECU
- Choose Query ECU to identify the ECU version fitted to the car
- Select Choose ROM File and pick the relevant modified ROM file to program into the ECU
- Enter the ROM filename or your unique name for the ROM file in the Comments box so that in future you know exactly which ROM is in the ECU
- Ensure that all electrical consumers about the car (such as interior lights, heater blower, stereo etc.) are turned OFF and that mobile phones are kept away from the car
- Choose Program ECU
- After programming the ECU, follow the on-screen instruction to cycle the Ignition
- Start the engine
If the ECU programming sequence is interrupted, ProECU
might not recognise the ECU automatically, in which case you will need
to apply a manual recovery procedure. This involves selecting the exact
model of car in the software, then programming a standard ROM for it.
Connecting to the ECU
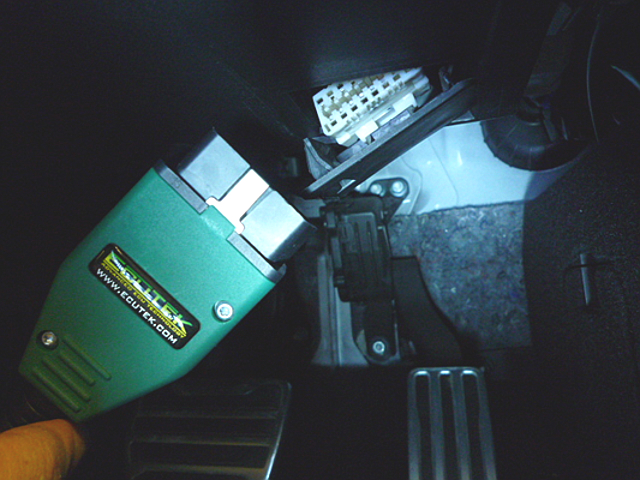
Plug the EcuTek OBD-II vehicle interface cable into the vehicle's diagnostic socket, which is usually located on the lower section of the dashboard above the pedals.The diagnostic socket is always sited inside the car's cabin and within one metre of the steering wheel. Connect the other end of the interface cable to a free USB port on your laptop.
Entering programming mode

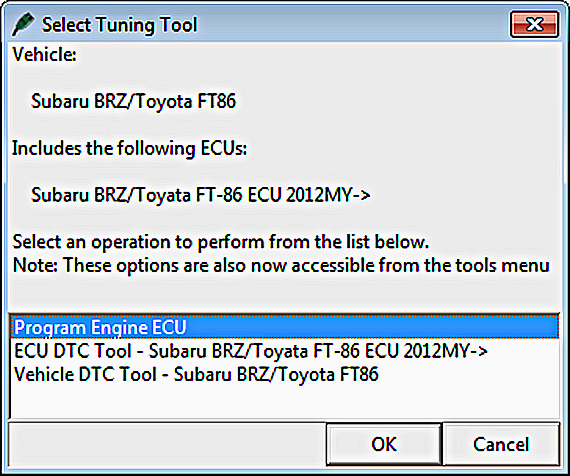
Choose Detect Vehicle… from the Tools menu, then select Program Engine ECU when the window appears, and click OK.
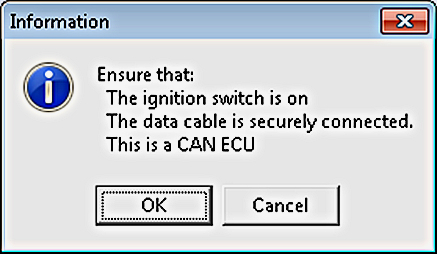
If these steps do not resolve the connection problem,
close ProECU, unplug the EcuTek vehicle interface, then plug it back in
and restart the software.
The ProECU Programming Tools window (below) will only be displayed
once ProECU has successfully established a connection to the ECU.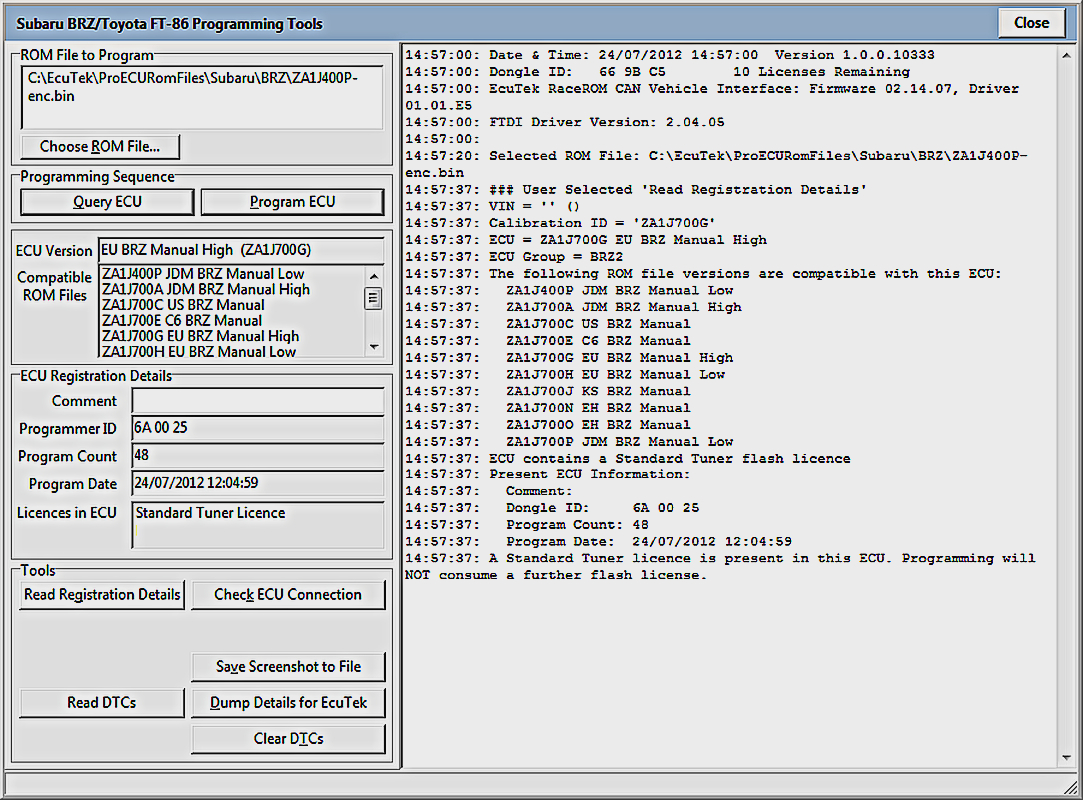
- Query ECU — The most common method of programming the ECU, as shown in the above screenshot
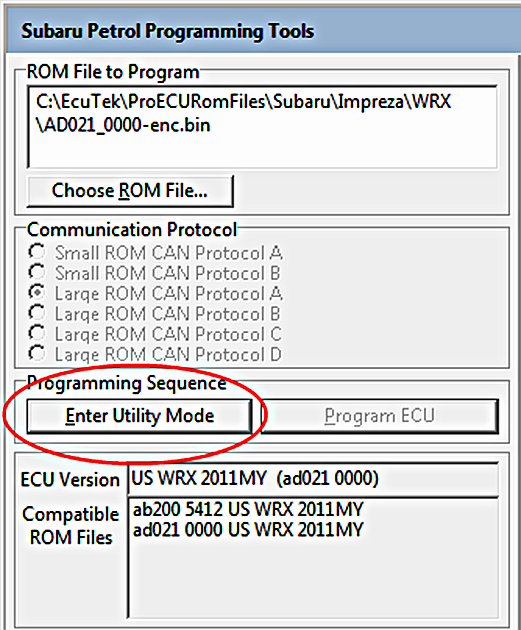
- Enter Utility Mode — The method used for most Subaru and Mitsubishi Diesel ECUs
Programming option 1 — Query ECU
Before attempting reprogramming, first select Query ECU to identify the exact ECU version. The ECU software version (ROM filename) is shown in the box below the Query ECU button; in this example it is EU BRZ Manual High (ZA1J700G). Other compatible ROMs are shown below the ECU version box.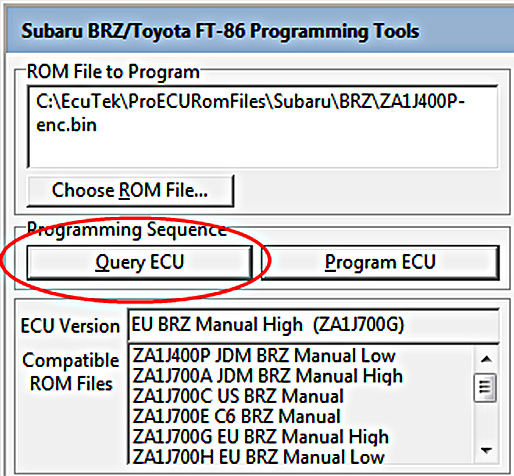
Programming option 2 — Enter utility mode
Before attempting to reprogram the ECU, select Enter Utility Mode to identify the ECU version. The ECU software version (ROM filename) is shown in the box below the Enter Utility Mode button; in this example it is US WRX 2011MY (ad021 0000). Other compatible ROMs are shown below the ECU version box.The correct communication protocol will be selected automatically.
NOTE: If you have entered the Utility mode but are not going to program the ECU, you will have to click the Restart ECU button.
Choosing a ROM file
Now select the ROM file with which you intend to reprogram the ECU. You can only select a modified ROM file that's based on the original ECU ROM or is a compatible ECU ROM.It is only possible to program a RaceROM patched file into the ECU or a completely standard ROM provided on EcuTek Update.
It is not possible to program a ROM into the ECU if it is not one shown in the Compatible ROM files window.
Program the ECU
Click on the Program ECU button after choosing the correct ROM. After programming the ECU, follow the on-screen instruction to cycle the ignition ON, OFF and back ON; it is important to do this in sequence with the correct time delays. Different ECUs will have different sequences, so be sure to read the instructions carefully, and to stick to them.Programming Errors and messages
ProECU displays error messages if programming can't start for some reason, are vehicle specific guides on DC's like this one for BRZ Have a look to see the meaning of some of the different tpes of error messages that may be seen.Programming failures (ECU recovery)
Programming failures can happen on any vehicle, and occasionally do — for a variety of reasons. Sometimes the cause is obvious, such as a cable falling out or the laptop battery running out of charge, but at other times it can be hard to find the cause.There's good news though, as in almost all cases the ECU can be fully recovered. Please refer to the relevant brief Knowledge Base article, and the appropriate section at the end of the car-specific manual.
Entering a comment
After choosing your ROM file it is highly recommended that you enter the filename in the Comment box under the ECU Registration Details section. This field should be used to store the name of ROM file used, the brand name or the version or state of tune. This is stored inside the ECU so that if the vehicle returns at a later date you can see exactly which ROM file you used in the ECU. Incidentally, the Comment is limited to 18 characters.The Comment is accessible by any ProECU user but is not viewable using an OBD-II reader/scanner or the factory diagnostic tools.
Reading a ROM
It is possible to read the ROM from the ECU using the Read ROM feature ONLY if the ECU has never previously been reprogrammed using EcuTek software. As this can take quite some time though, you have to be patient.If you have previously programmed the ECU using ProECU you will be allowed to read the ROM, but if your programmer ID (licence key ID) does not match the previous programming dongle ID, you will not be allowed to.
The ROM file saved when the Read ROM feature is used can be opened for programming and editing using ProECU.
Reading registration details
The following stored information will be retrieved and displayed from the ECU by clicking on the Read Registration Details button:- Comment — The comment field as described above.
- Programmer ID — The ID of the user who programmed the ECU. Each licence key has a unique ID so the authenticity of an ECU can easily be confirmed.
- Program Count — The number of times the ECU has been reprogrammed. The rated life of the memory chip is said to be in the region of 100 reprograms, although this limitation applies more to older ECUs (1990s/early 2000s) than it does to today's products. Manufacturers usually quote a deliberately low re-flash limit but in our experience there is no deterioration in memory-chip performance, even after 300 or more reprogrammings.
- ECU Version — For example JF01C, ZA1J700G, AN330_0182. This will tell you on which basic ROM file any tuning should be based. This function does not reprogram the ECU but only retrieves information from it.
- Clear DTCs — Click on the Clear DTCs button to clear all the stored trouble codes in the vehicle’s various ECUs. This should be done after programming to ensure that all DTCs caused by the programming sequence are also cleared.
Progress window data box and log files
On the right of the Programming Tool window is a progress display. This area provides information throughout the reprogramming process. It records and stores information such as the ROM filename you've used, your dongle ID, the version of software you are using and the unique ID code. All this data is recorded in a log file that updates every time you are in Utilities Mode.The log file is stored alongside the ProECU executable in the C:\EcuTek folder…
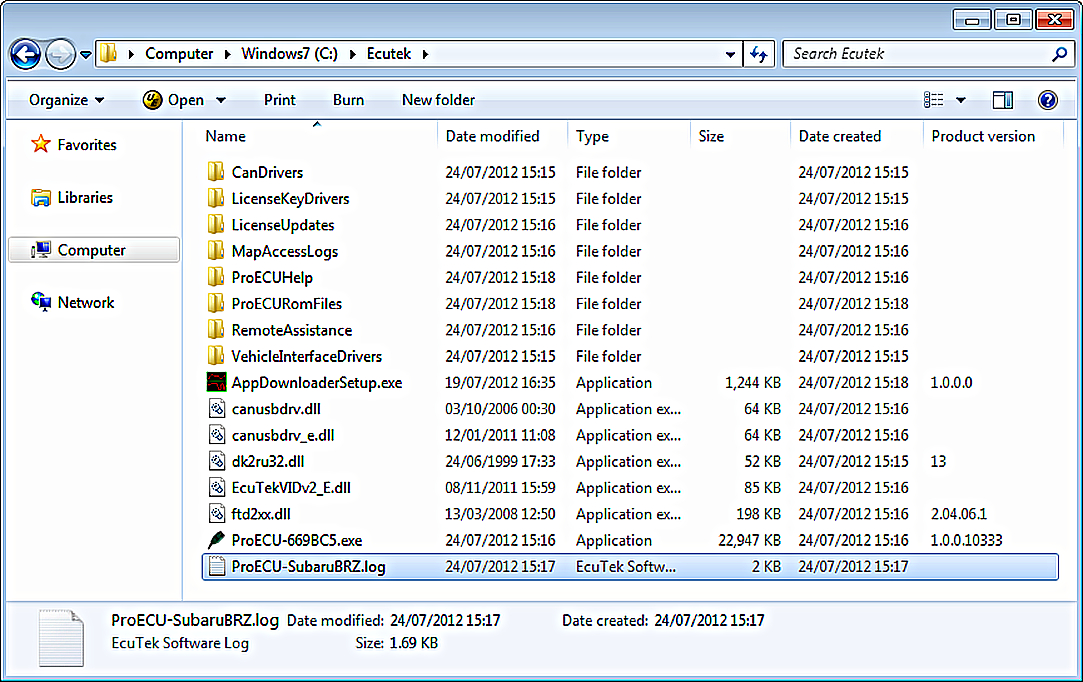
As an example, the file containing all Subaru BRZ/Toyota FT-86 ECU programming data has the name ProECU-SubaruBRZ.log.
Sometimes the log file or file extensions may be hidden by the Windows operating system. You can tell windows to show the log files and extensions through the Folder Options window, but the method to open this window depends upon which version of the Windows operating system you are using.
- Windows 7 — In Windows Explorer, click on Organise, then Folder and search options.
- Windows 8, 8.1 and 10 — In Windows Explorer, click View, then Options. In the window that appears, go to the
Another tip is that you can right-click on the bar in Windows Explorer that says Name, Size, Type and choose the More… option, then add the very useful column marked Product Version.
EcuTek information dump
It is possible you will come across an ECU version that EcuTek has not yet seen, and where this is the case you will not be able to program the ECU until EcuTek has been supplied with certain information about it.The Dump Details for EcuTek button saves certain information from this ECU in a file that is saved into the C:\EcuTek\RomDumps folder. The name of the file will be displayed as it is saved.
This information should be sent to EcuTek using the EcuTek ROM Dump Form, together with a clear photograph of the ECU label and full details of the type of car from which the ECU originates, including its Model Year and transmission type. EcuTek will then supply an updated version of ProECU that will be capable of programming the ECU.
This is not something that can be done on a
while-you-wait basis. Turnaround time is likely to be between three and
seven days for support of a new ECU. It is vital therefore that the
tuner checks the ECU version is supported well before the car is
scheduled to be reprogrammed. Note also that it is not possible to open
ROM Dumps in ProECU until the file has been emailed to EcuTek.

Komentar
Posting Komentar